Thursday, July 23, 2009

Teaching Children to Make a Gem Tree

This past month I have spent my days with an 11 yo boy. Since I'm a girl and into girly crafts, I knew he wouldn't be interested, so I had to find other activities. First it was painting wood, then painting pictures, scrabble tile pendants, and now gem trees. The gem trees by far win his vote for favorite craft even over painting.

We started out making trees Monday of this week and he has made a tree almost every day. The first tree we made together with 3 and 5 stone branches. The second day he made a 2 stone branch tree all on his own and then the third day a 3 and 5 stone branch tree. I did do the gluing onto the rock base and he did make one at home one night...I haven't seen that one, but my mother said it didn't turn out too good. He really works best with supervision and verbal help occasionally.

Here he is with my brother (his dad) and two of his trees.

So, it is possible to teach kids how to make gem trees and to appreciate the design elements. He is already talking about wanting to go to the bead store and buy his own wire and stones....LOL what have I created.

Read more...

Saturday, July 18, 2009

New Tutorials for Gem Trees


I've been busy working the past couple of days dissecting parts of my book to make tutorials. With the economy the way it is and not picking up anytime soon, some people may not have the funds to purchase the book, so how about a cheaper alternative and that is a tutorial.

The tutorials are all the same instructions as what I wrote in the book except that they have some color photos vs. all B&W. I have the Standard Gem Tree, Pine Tree, 2 Leaf Tree and the Jewelry/Earring Tree completed and ready to e-mail as a .pdf download file. Check out my ArtFire and Etsy shops for the tutorials and gem tree kits as well as the book. My 1000 Markets site has completed gem trees and the book for sale.

On the plus side, I have had some sales of my book and am encouraged that between the gem and mineral clubs in the area, friends, family members and the national show in Montana, I will probably break even on my costs to publish the book....or at least that is my hope and my husbands. Wish me luck.

Read more...

Thursday, July 16, 2009

Gem Tree Book update

Yes, I now have books for sale on my 1000 Markets and ArtFire shop. Soon I'll be posting it on Etsy along with kits and finished trees. Please feel free to check out both shops if you are interested in purchasing a book. The publisher Trafford.com also has the book in their bookstore.

Here are the links to my shops:

www.danasjewelrydesign.artfire.com
www.danasjewelrydesign.1000markets.com

If you have any questions, please feel free to ask. Thanks. Oh and if you have e-mailed me to let you know when the books are published, that e-mail will be going out this week.

Read more...

Tuesday, July 7, 2009

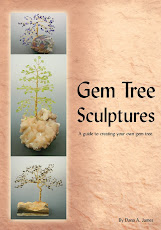
Book is Finished...Yes Again

I received the final proof copy and it is good. I've order my copies and the book is available on the Trafford web site HERE. It has been a long road and I won't really consider it complete until I have all my printed copies in hand (end of next week), but just knowing that what the publisher has available is good is making me happy.

Next on my list is my two additional competition trees for Montana that need to be completed by the end of this month as well as my display case liners. I have the first tree almost completed, but I'm now trying to decide if it needs more stones. It is the Down Under tree (instructions in the book) made with faceted carnelian briolettes. I thought adding some peridot would bring a little bit more life into it, but it isn't working for me....maybe some freshwater pearls. I'll post a picture when I have it completed. The second tree I haven't even started and it will be the most challenging. It is a palm tree with braided wire branches and a woven wire trunk. This one may have to be on the small scale in order to complete it by show time.

I hope everyone is having a great Summer so far and I'll try not to wait so long between posts this next time. If you just can't get enough of me and want to read my daily blog about all the happenings check out THIS.

Read more...

Saturday, June 6, 2009

The Book Proof is HERE

Okay I received in the mail last night a copy of the book hard copy proof and not just the eproof. I'm a little disappointed and sent an email to the publisher about the print quality, so we shall see if they can fix the problems. I'm so ready for this book to be finished. I'll take some pictures this weekend and post them again.

Off to the gem and mineral club annual show. More to come.

Read more...

Tuesday, May 19, 2009

Getting Closer to Publication

I just finished reviewing the final proof of the book "Gem Tree Sculptures". I have my order in for additional copies and am hopeful that those will arrive by the end of May. Yea.

I know many of you that lurk and read these posts are wanting the book and some of you have e-mailed me separately, so when I do have copies available for sale, I will be sending you all an e-mail on where to purchase. I'll also be posting a notice on Twitter, my other blogs and Facebook, just in case you don't receive the initial offering e-mail.

Thanks everyone for being so patient.

Read more...

Monday, April 20, 2009

2 Leaf Gem Tree Instructions

I may be discontinuing one of my other crafting blogs and wanted to make sure I had these instructions out here for all you gem tree addicts. I wrote this a couple years ago and have included it in my new book with updated pictures and more complete instructions....sorry if you want those instructions you will have to buy the book.

Speaking of the book, I talked to my publisher on Friday and she indicated that it will be end of April, first week of May before I get to see it. I was hoping it would be this week.....oh well.

Back to the 2 Leaf tree. This is a simple design and one that displays charms really well. Build in the same manner as my mini tree only instead of 3 leaf branches you will have 2 leaf branches.

Basic Gem Tree Construction for a 2 Leaf Branch

This tree can be as big or small as you wish by continuing to make and add branches and limbs to the trunk.

Materials used:
Gemstones or beads with holes in the middle
24 guage craft wire in gold, silver, copper, or any other color complimentary to your stones.
527 Craft Glue
Wire cutters
Smooth Nose Pliers for helping to twist the wire on the trunk
Rock for the base of tree or a Dish (Terra Cotta Pot Saucer works well filled with sand)
Bowl to hold gemstones for sorting (helps so they don’t roll all over the place)
Rubberbands or Mini Clamps (clamps can be found at hardware or Sears stores)

Cut your craft wire to 36". String a stone or multiple stones if small on one wire, folding it in half with your stone(s) at the folded end. Hold the wire in between thumb and forefinger of one hand in the shape of a V and the stone in the other hand. Twist the stone 5 half twists for approximately ¼ inch. Be sure to keep the end (loose) wires separated and to hold your hands away from your face as the loose wires can poke you in the eye if you are not careful.
String your next stone on the longest wire approx. 1/2 inch away from the twisted center. Fold the wire in half with the stone at the folded end, holding the stone in one hand and the wires in the other hand at the center, twist the stone until the two twisted wires meet at the center. Finish off this branch by twisting the open wires approx. 5 to 10 half twists.

If you only want to learn this 2 leaf branch, then you can set this one aside and continue making branches. For a mini tree, you will need at least 16 of these.

Separate out all your branches into sets of 2. You should have 8 sets. Twist two branches together at the open wire end by stacking one on top of the other. Hold the stones in one hand, splay out the leg wires to create a V shape and with your other hand twist the wires at the bead end all together 5 to 10 half twists, to start your limb. Do not twist the wires up towards the beads but twist the loose wires together. Continue joining branches to make limbs until you have 8 sets that look like the 2nd picture in the bottom row of the diagram. Please remember to keep your end wires separated into leg like structures, otherwise they will tangle and not twist well.
To put your mini tree together, take 2 limbs as shown in the 2nd picture in the bottom row of the diagram and twist together 5 twists. Take another set of 2 limbs and twist together. Twist both double sets together at least 3 to 5 half twists to start your trunk set this aside. Twist your other four remaining limbs together the same way. For more depth make one limb longer by adding a few more twists at the bottom. Join these two together as shown below and twist your trunk. You may want to use your smooth pliers to get a nice tight twist. Twist down as tall as you want your tree to be.

Finish off your tree by dividing the loose end wires into three or four sets and twist to make roots 1 ½ to 2" long. Roughly place your tree, roots down onto your base, spreading the roots out enough to make the tree stable. (If placing on a rock, use the rubberbands to secure the roots prior to gluing.) Clip off excess wire with wire cutters. Place some glue on the roots and set in dish (or secure rubberband around the root onto the rock). Mini clamps work well also when gluing to rocks. Glue all roots using the same method. Allow at least 2 hours to dry before taking the clamps or rubberbands off. Clean up any glue messes with fingernail polish remover on a Q-tip. Arrange tree limbs and branches to your satisfaction and you’re done.

Read more...