Thursday, December 6, 2007

Gem Tree Kit

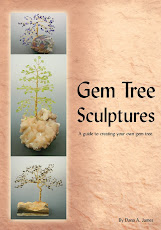
In my very first post of this series, I listed all the materials needed to create one of these wonderful trees. Since then I have done some research on purchasing all the materials and have found that in my area of Washington State we have a bead store that sells the majority of items needed, but for some, you may have to go to several different stores. This being a major inconvenience, I will be offering gem tree kits for sale on my Dana's Jewelry Design.com web site. Click on the link and then go to Gem Tree Kits. So you will now have the choice of purchasing a completed tree by my husband or myself or purchasing the kit with printed instructions. Two kit sizes will be available, 1st kit would make a small tree as in the 3 leaf design within this blog and the 2nd kit would be a larger quantity of the same items, such as the gemstones and the wire. The 2nd kit would make several of the smaller trees or one large tree.

These kits would be great for a Cub Scout or Girl Scout activity or any kids club. They also make wonderful gifts for anyone crafty.

If you do live in the Western Washington State area, I do have classes available. Please contact me if you have a group that would like a private class or you would like to attend one of my scheduled classes. I do provide all the tools and materials for classes.

Here is a little bit about my skill and knowledge in designing gem trees and teaching gem tree design. I've been making trees for the past seven years and teaching in a classroom setting with up to 13 students for the past 4 years. I also demonstrate gem tree design with my husband at several Western Washington gem and mineral shows during the Summer and Fall. This past year, I entered a gem tree competition at the NW Regional level for gem and mineral clubs and won first place in my division. I have also helped design a workshop with my husband and an associate, Colleen Delaney, on the mental and emotional healing aspects of gem tree creation.

If you have any questions at all please e-mail me at dana@acorn-hill.com. My goal is to empower you to be creative and enjoy the process of learning and discovery. I also have an additional site that includes more instructions on how to make gem trees with more stick drawings. See my favorite links to connect to that site.

Read more...

Wednesday, October 17, 2007

Building a Bigger Gem Tree

In my previous blog we made a 3 leaf tree, in this segment I will instruct on how to extend that to 5 leaf tree.

As in the previous post constuct your 3 leaf branch, but instead of finishing it off with the 10 twists, only twist down 5 half twists and add another stone. Connect this to the branch the same way you did stone number 2, making sure that your twists meet at the center. Add your 5th stone and once all twists have been completed finish off this branch by twisting 10 twists. Set this aside and continue making 5 leaf branches until you have the desired number.

The limb structure that I prefer uses 3 3 leaf branches and 6 5 leaf branches. Remember to make branches in sets of 3. To put this together, twist the 3 3 leaf branches together about 5 twists or 1/2 inch, add 3 of the 5 leaf branches by putting 2 on one side of the set of 3 leaf and 1 on the other, twist this together to hold and down about 1/4 to 1/2 inch. The longer you twist down the wider or taller your tree will become. Finally, add your remaining 3 branches with 2 on one side and 1 on the other. To finish this limb, twist down at least 1 inch. When adding this to the trunk you may want to add more twists.

Make 4 or 5 of these complete limbs before attempting to put together your trunk.

To make your trunk, take two completed limbs and twist together approximately 5 twists or 1/2 to 3/4 of an inch. The number of twists is totally up to you and will determine how dense and tall the tree is. To make the tree more condensed, then only twist enough to hold all the limbs together on the trunk before adding another set. Continue down the trunk adding limbs. Limbs can be added individually or two together depending upon your design.

After all the limbs have been added and you have twisted down far enough for the height of the tree to be how you like it (please insure that you did not twist down too far or your tree will become unstable and fall over), you can now divide up the remaining wires and twist into your roots. I usually make at least 3 to 4 roots for it to be stable on the rock. Trim your excess wires and form the roots onto the rock or dish. Glue the underside of the roots to the rock or dish and secure with rubberbands or mini clamps. Let dry for approximately 1 to 2 hours before taking off the bands. Reglue any roots that need to be and secure again. Let dry for another 1 hour before removing any bands or clamps. Arrange your limbs and branches in a pleasing manner or in the design you choose. Enjoy your tree.

If you have never made a gem tree before, I highly recommend making a 3 leaf tree prior to moving to the larger version of the 5 leaf to get a feel of how the tree is made.

If you have any questions regarding these instructions, please feel free to contact me. I do offer classes if you live in the Western Washington area. Thanks for stopping by, Dana

Read more...

Tuesday, July 17, 2007

Making a 3 Leaf Branch

In my last post, it was all about the supplies you would need. Here we will detail out how to construct a 3 leaf branch.

Cut your craft wire to 36”. String a stone or multiple stones if small on one wire, folding it in half with your stone(s) at the folded end. Hold the wire in between thumb and forefinger of one hand in the shape of a V and the stone in the other hand. Twist the stone 5 half twists for approximately ¼ inch. Be sure to keep the end (loose) wires separated and to hold your hands away from your face as the loose wires can poke you in the eye if you are not careful.

String your next stone on the longest wire approx. 1/2 inch away from the twisted center. Fold the wire in half with the stone at the folded end, holding the stone in one hand and the wires in the other hand at the center, twist the stone until the two twisted wires meet at the center.

String your next stone on the longest wire and leave approx. 1/2 inch away from the twisted center. Fold the wire in half with the stone at the folded end, holding the stone in one hand and the wires in the other hand at the center, twist the stone until the all twisted wires meet at the center. Finish off this branch by twisting the open wires approx. 10 to 15 half twists. Finished branch will resemble Diagram 1.

If you only want to learn this 3 leaf branch, then you can set this one aside and continue making branches. For a mini tree, you will need at least 15 of these.

Separate out all your branches into sets of 3. You should have 5 sets. Twist three branches together at the open wire end by stacking all three. Hold the stones in one hand, splay out the leg wires to create a V shape and with your other hand twist the wires at the bead end all together 10 half twists, as in Diagram 2 to create a limb. Do not twist the wires up towards the beads but twist the loose wires together. Continue joining branches to make limbs until you have 5 sets that look like the finished Diagram 2. Please remember to keep your end wires separated into leg like structures, otherwise they will tangle and not twist well.

To put your mini tree together, take 2 limbs as in finished Diagram 2 and twist together 5 to 10 half twists. Take another 2 limbs and twist together. Twist both double sets together at least 3 to 5 half twists to start your trunk. Add your remaining limb to complete your trunk by twisting down 10 half twists or as tall as you want your tree.

Finish off your tree by dividing the loose end wires into three or four sets and twist to make roots 1 ½ to 2” long. Roughly place your tree, roots down onto your base, spreading the roots out enough to make the tree stable. (If placing on a rock, use the rubberbands to secure the roots prior to gluing.) Clip off excess wire with wire cutters. Place some glue on the roots and set in dish (or secure rubberband around the root onto the rock). Mini clamps work well also when gluing to rocks. Glue all roots using the same method. Allow at least 2 hours to dry before taking the clamps or rubberbands off. Clean up any glue messes with fingernail polish remover on a Q-tip. Arrange tree limbs and branches to your satisfaction and you’re done.

Enjoy your tree. These make great gifts for everyone and the wonderful thing is you made it. Watch for my next segment that will spot light a 5 and 7 leaf branch.

Please note that all instructions contained on this site are copyrighted. To republish this material, please contact Dana James for approval.


Read more...

Thursday, June 28, 2007

Getting Started


I thought I would start this blog as gem trees are catching on more as a lapidary hobby. My husband and I teach and demonstrate gem tree design, so what would be more appropriate then a guide to make one. There are several types of gem trees and I prefer the kind where you don't glue the gems to the wire, but use gems or beads with holes and twist the wire with the beads in it to make the leaves and branches. The shapes are varied and is totally up to your imagination. This is a great hobby for children and those with limited resources.


Supplies you will need:

  • Wire cutter (small jewelry ones are fine)
  • Smooth Nose Pliers (small jewelry ones are fine)
  • 24 guage craft wire in whatever color you choose to match your gems/beads
  • gemstone chips or beads with holes
  • Ruler or someway to measure your wire
  • Dish to hold gems/beads
  • Rock or Dish as base for tree
  • 527 Craft glue/cement (can be found at any craft store)
The picture of the gem tree is one that my husband made. Trees similar to this one are available on my web site for sale if you would prefer to just purchase and not make one.

Stayed tuned for my next post on creating a branch with leaves.

Thanks, Dana

Read more...