Showing posts with label How to. Show all posts

Wednesday, June 25, 2008

Competition

Well we made it back from the Regional competition in Ontario, Oregon. Boy was it hot. Going from 60 degrees to 90 degrees was a bit much and drained us completely of energy by early afternoon. I set up my display case on Thursday and the judging was on Friday. I had the unfortunate luck of not having any lights in my display during judging. Thankfully, they did not count that against me....not something I had control over. I was dinged on a couple of other items but that is fixable. The trees however were a big success and everyone including the judges thought they were great. Here is a picture of my display case showing the trees and the blue ribbon earned.
The pine tree in the back row seemed to be the favorite from most everyone I talked to with the bonsai tree front right was next.

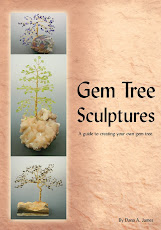
I was able to promote my upcoming book as several people came up to me and wanted to know how to make them.

I have a couple of additional questions out to one of my judges for clarification of labeling for my competition next year. Next year it has to be perfect to take the Sweepstakes award at the National level.

Of these trees, I will be holding onto the Smoky Quartz (top left), Malachite Pine tree (top middle) and the bonsai which is a Pearl tree on Carnelian (bottom right). One of the new trees I will add to this collection for next years competition is a palm tree made with Labradorite stones. The palm tree is a completly different style as the limbs wire is braided vs. twisted and the trunk wire is woven on a support core of copper tubing. I have a year to make it so I'll have to get started on a prototype. I'll post a picture out here when it is finished.

If you have any comments, I would love to hear from you. As I have mentioned before, some of my previous posts for 2007 in this blog do have instructions for building a gem tree.

Read more...

Thursday, April 17, 2008

The Gem Tree Class - Part 2

The "Class" as I fondly call it, didn’t turn out as overwhelming as I thought it would be. There was another large community event that same day that took some of the kids that would have joined in, plus it was the first 70 degree plus day of the year, so who wanted to be stuck inside. All in all we had 26 participants with two of them adults. I had four helpers that floated around the tables helping out when the kids or adults ran into problems along with a few parents that helped out.


The girls were very well behaved, paid attention and hopefully learned enough to create a tree on their own.

The hardest part was gluing all the trees to the rocks at the end of the class and making sure they were secured with rubber bands. Since there were so many, it took longer than expected but we still finished within our 4 hour estimate. If these had been adults we would have had them glue their own tree, but the glue is messy and can be toxic, so I did most all of them.

I’m sure that I will be offering this to other Girl Scout troops or Boy Scouts for that matter, but we will be limiting class size to 20 total participants to make it a little bit more manageable. Since this was a non profit group we only charged for our costs of material. For any other group, we would have also charged for our time.

My last post mentioned my Stress Reduction Tree Class and how it turned out, so I have scheduled another one. This time I will be teaching the standard gem tree design in 3 lunch sessions. Since these are work associates, and I’m hoping to make one of my competition trees during this time, I am only charging for the materials.

I also have found a work associate who will do freelance editing for my book. I may actually get this finished prior to some of my demonstrations this Summer.

Read more...

Wednesday, October 17, 2007

Building a Bigger Gem Tree

In my previous blog we made a 3 leaf tree, in this segment I will instruct on how to extend that to 5 leaf tree.

As in the previous post constuct your 3 leaf branch, but instead of finishing it off with the 10 twists, only twist down 5 half twists and add another stone. Connect this to the branch the same way you did stone number 2, making sure that your twists meet at the center. Add your 5th stone and once all twists have been completed finish off this branch by twisting 10 twists. Set this aside and continue making 5 leaf branches until you have the desired number.

The limb structure that I prefer uses 3 3 leaf branches and 6 5 leaf branches. Remember to make branches in sets of 3. To put this together, twist the 3 3 leaf branches together about 5 twists or 1/2 inch, add 3 of the 5 leaf branches by putting 2 on one side of the set of 3 leaf and 1 on the other, twist this together to hold and down about 1/4 to 1/2 inch. The longer you twist down the wider or taller your tree will become. Finally, add your remaining 3 branches with 2 on one side and 1 on the other. To finish this limb, twist down at least 1 inch. When adding this to the trunk you may want to add more twists.

Make 4 or 5 of these complete limbs before attempting to put together your trunk.

To make your trunk, take two completed limbs and twist together approximately 5 twists or 1/2 to 3/4 of an inch. The number of twists is totally up to you and will determine how dense and tall the tree is. To make the tree more condensed, then only twist enough to hold all the limbs together on the trunk before adding another set. Continue down the trunk adding limbs. Limbs can be added individually or two together depending upon your design.

After all the limbs have been added and you have twisted down far enough for the height of the tree to be how you like it (please insure that you did not twist down too far or your tree will become unstable and fall over), you can now divide up the remaining wires and twist into your roots. I usually make at least 3 to 4 roots for it to be stable on the rock. Trim your excess wires and form the roots onto the rock or dish. Glue the underside of the roots to the rock or dish and secure with rubberbands or mini clamps. Let dry for approximately 1 to 2 hours before taking off the bands. Reglue any roots that need to be and secure again. Let dry for another 1 hour before removing any bands or clamps. Arrange your limbs and branches in a pleasing manner or in the design you choose. Enjoy your tree.

If you have never made a gem tree before, I highly recommend making a 3 leaf tree prior to moving to the larger version of the 5 leaf to get a feel of how the tree is made.

If you have any questions regarding these instructions, please feel free to contact me. I do offer classes if you live in the Western Washington area. Thanks for stopping by, Dana

Read more...

Thursday, June 28, 2007

Getting Started


I thought I would start this blog as gem trees are catching on more as a lapidary hobby. My husband and I teach and demonstrate gem tree design, so what would be more appropriate then a guide to make one. There are several types of gem trees and I prefer the kind where you don't glue the gems to the wire, but use gems or beads with holes and twist the wire with the beads in it to make the leaves and branches. The shapes are varied and is totally up to your imagination. This is a great hobby for children and those with limited resources.


Supplies you will need:

  • Wire cutter (small jewelry ones are fine)
  • Smooth Nose Pliers (small jewelry ones are fine)
  • 24 guage craft wire in whatever color you choose to match your gems/beads
  • gemstone chips or beads with holes
  • Ruler or someway to measure your wire
  • Dish to hold gems/beads
  • Rock or Dish as base for tree
  • 527 Craft glue/cement (can be found at any craft store)
The picture of the gem tree is one that my husband made. Trees similar to this one are available on my web site for sale if you would prefer to just purchase and not make one.

Stayed tuned for my next post on creating a branch with leaves.

Thanks, Dana

Read more...