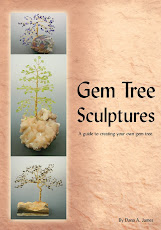
In my previous blog we made a 3 leaf tree, in this segment I will instruct on how to extend that to 5 leaf tree.
As in the previous post constuct your 3 leaf branch, but instead of finishing it off with the 10 twists, only twist down 5 half twists and add another stone. Connect this to the branch the same way you did stone number 2, making sure that your twists meet at the center. Add your 5th stone and once all twists have been completed finish off this branch by twisting 10 twists. Set this aside and continue making 5 leaf branches until you have the desired number.
The limb structure that I prefer uses 3 3 leaf branches and 6 5 leaf branches. Remember to make branches in sets of 3. To put this together, twist the 3 3 leaf branches together about 5 twists or 1/2 inch, add 3 of the 5 leaf branches by putting 2 on one side of the set of 3 leaf and 1 on the other, twist this together to hold and down about 1/4 to 1/2 inch. The longer you twist down the wider or taller your tree will become. Finally, add your remaining 3 branches with 2 on one side and 1 on the other. To finish this limb, twist down at least 1 inch. When adding this to the trunk you may want to add more twists.
Make 4 or 5 of these complete limbs before attempting to put together your trunk.
To make your trunk, take two completed limbs and twist together approximately 5 twists or 1/2 to 3/4 of an inch. The number of twists is totally up to you and will determine how dense and tall the tree is. To make the tree more condensed, then only twist enough to hold all the limbs together on the trunk before adding another set. Continue down the trunk adding limbs. Limbs can be added individually or two together depending upon your design.
After all the limbs have been added and you have twisted down far enough for the height of the tree to be how you like it (please insure that you did not twist down too far or your tree will become unstable and fall over), you can now divide up the remaining wires and twist into your roots. I usually make at least 3 to 4 roots for it to be stable on the rock. Trim your excess wires and form the roots onto the rock or dish. Glue the underside of the roots to the rock or dish and secure with rubberbands or mini clamps. Let dry for approximately 1 to 2 hours before taking off the bands. Reglue any roots that need to be and secure again. Let dry for another 1 hour before removing any bands or clamps. Arrange your limbs and branches in a pleasing manner or in the design you choose. Enjoy your tree.
If you have never made a gem tree before, I highly recommend making a 3 leaf tree prior to moving to the larger version of the 5 leaf to get a feel of how the tree is made.
If you have any questions regarding these instructions, please feel free to contact me. I do offer classes if you live in the Western Washington area. Thanks for stopping by, Dana
Read more...


